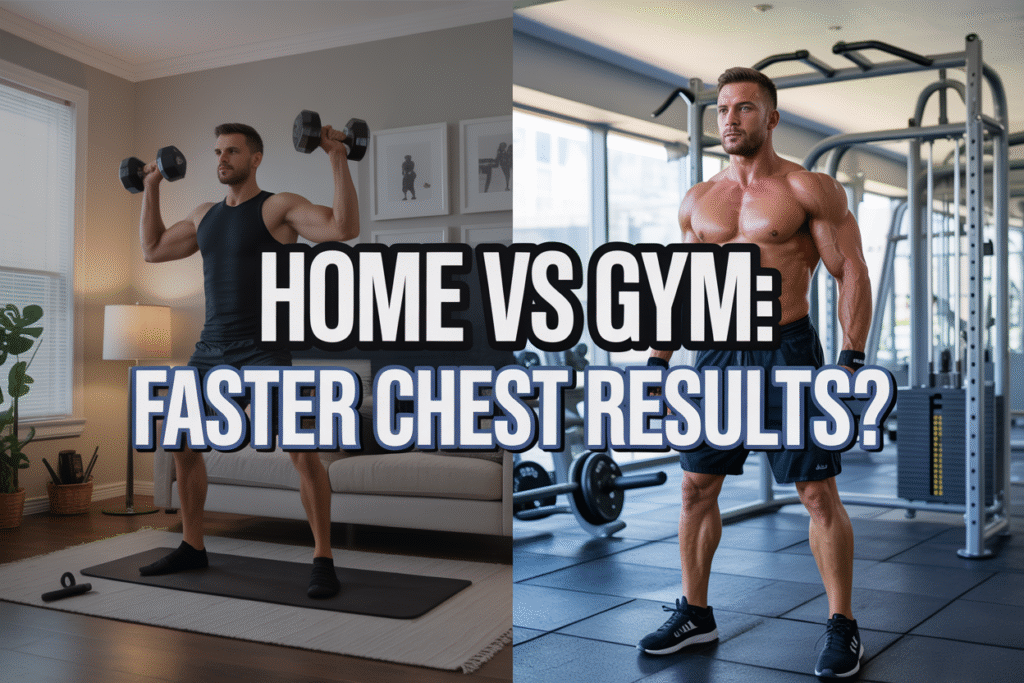
Building a bigger, stronger chest isn’t just about showing up at the gym, it’s about choosing the right Lower Chest Workout for your body and training environment. While gyms offer endless machines and heavy barbells, your home setup can still deliver impressive results if you know how to train smart. If you’ve been stuck doing random chest routines with little progress, this guide will help you finally connect the dots.
Most people believe that expensive equipment is the secret to carving out a defined lower chest. In reality, your genetics, exercise selection, and consistency play a much bigger role than where you train. For some lifters, home workouts even bring better gains by removing distractions and forcing stricter focus on form and muscle activation.
In this guide, we’ll compare the strengths of home and gym training, highlight the most effective exercises for each setting, and show you how to tailor your approach. You’ll also learn how to find your natural sternum angle a powerful but often overlooked detail that determines whether you should prioritize flat presses, dips, or slight incline variations for maximum lower chest growth.
Why Traditional Barbell Bench Press Falls Short for Maximum Chest Growth

Genetic Structure Limitations with Fixed Bar Position
The barbell bench press forces your arms into a predetermined path that may not align with your individual bone structure and joint mechanics. Unlike dumbbells or cables that allow for natural movement patterns, the fixed barbell position creates a rigid pathway that can work against your body’s natural biomechanics. This constraint becomes particularly problematic when your shoulder width, arm length, or ribcage shape doesn’t match the “average” person for whom the exercise was originally designed.
Studies reveal that while a bigger bench press often correlates with a bigger chest on average, some individuals are clear outliers who do not experience chest growth from this exercise. The barbell essentially locks your arms into a fixed position, which can prevent proper chest activation for individuals whose bone structure simply isn’t suited for this movement pattern. Your unique skeletal framework determines the optimal angle and range of motion needed for maximum muscle fiber recruitment.
Individual Variations in Muscle Activation Patterns
Each person’s muscle activation patterns during the bench press vary significantly based on their genetic makeup. Some individuals naturally recruit their triceps and anterior delts more heavily during the movement, while others achieve better pectoral activation. These variations stem from differences in muscle fiber orientation, insertion points, and neurological recruitment patterns that are largely determined by genetics.
The traditional barbell bench press might not be effective for everyone due to these individual genetic structures and variations in muscle activation patterns. What works exceptionally well for one person may produce minimal chest development for another, despite using identical form and progressive overload principles.
The Problem with One-Size-Fits-All Exercise Approaches
The fitness industry’s heavy reliance on the barbell bench press as the gold standard for chest development reflects a fundamental misunderstanding of human anatomical diversity. This one-size-fits-all approach ignores the reality that optimal exercise selection must account for individual structural differences. When an exercise doesn’t match your body’s unique characteristics, you’re essentially fighting against your anatomy rather than working with it, leading to suboptimal results and potential injury risk.
Understanding Your Unique Sternum Angle for Optimal Results

How to Determine Your Personal Sternum Configuration
Understanding your unique anatomical structure is crucial for optimizing chest development. Your sternum angle significantly influences which exercises will be most effective for targeting different areas of your chest. To accurately assess your personal sternum configuration, you’ll need to perform a simple assessment that takes just minutes but provides invaluable insight into your training approach.
The most reliable method for determining your sternum angle involves using your smartphone as a measuring tool. Lie down on a flat bench in your typical bench press position, ensuring your shoulder blades are properly retracted and your back maintains its natural arch. Place your phone directly on your sternum, positioning it between your pectoral muscles at the center of your chest. The way your phone sits will immediately reveal your sternum configuration.
If your phone tilts downward toward your feet, you have a steeper sternum angle. This anatomical variation is more common than many realize and significantly impacts exercise selection. Conversely, if your phone sits relatively horizontal or flat against your chest, you possess a flat sternum angle configuration.
Adjusting Incline Angles Based on Your Body Type
Now that we have covered how to identify your sternum configuration, the next critical step involves adjusting your training angles accordingly. Your sternum angle directly dictates the optimal incline settings for maximum chest activation and growth.
For individuals with a steep sternum angle, traditional flat bench pressing actually functions more like a decline movement. This means the flat bench primarily targets the lower chest rather than providing balanced development. To effectively engage the upper chest fibers, you’ll need to use a significantly higher incline angle, typically ranging from 30 to 45 degrees. This steeper incline compensates for your natural anatomy and ensures proper upper chest activation.
Those with a flat sternum angle require a completely different approach. Since your anatomy allows the flat bench to function as intended, only minimal incline adjustments are necessary. Moving the bench up just 1-2 notches from flat position provides sufficient angle to activate the upper chest without over-engaging the anterior deltoids. This subtle adjustment prevents shoulder dominance while maintaining optimal chest targeting.
Why Flat vs Steep Sternum Angles Require Different Approaches
With this understanding of anatomical variations in mind, it becomes clear why cookie-cutter training programs often fail to deliver optimal results. The fundamental difference between flat and steep sternum configurations necessitates entirely different exercise selection and execution strategies.
Steep sternum individuals must recognize that what appears to be an upper chest exercise on paper may actually target the lower chest due to their anatomy. This explains why many people struggle to develop their upper chest despite performing countless incline movements at traditional angles. The steep sternum creates a natural decline effect that must be counteracted with higher incline angles.
Flat sternum individuals face the opposite challenge. Using excessive incline angles shifts emphasis away from the chest and onto the shoulders, reducing chest activation and potentially leading to shoulder impingement over time. The key lies in understanding that minimal adjustment produces maximum results for this body type.
Exercise 1: Incline Dumbbell Press for Superior Chest Activation
Switching from Barbell to Dumbbells for Better Range of Motion
Now that we understand the limitations of traditional barbell movements, switching from a barbell to dumbbells opens up a world of possibilities for enhanced chest development. This transition allows for greater freedom to adjust pressing angles, which directly translates to better chest activation throughout the movement.
Unlike the fixed bar path of a barbell, dumbbells enable your arms to move in their most natural trajectory, accommodating your individual biomechanics and joint structure. This freedom of movement means you can fine-tune the angle of press to target specific areas of your chest more effectively, while also reducing the risk of shoulder impingement that often occurs with rigid barbell movements.
The independent nature of dumbbell training also forces each side of your chest to work individually, eliminating compensation patterns where your stronger side might take over during barbell pressing. This bilateral training approach ensures balanced development and helps identify and correct any strength imbalances between your left and right pectorals.
Finding Your Optimal Incline Setting for Maximum Growth
Previously, many lifters assumed that flat bench pressing was the gold standard for chest development, but research has shown that incline bench press results in similar mid-chest growth as flat bench, while delivering significantly more upper chest development. This makes the incline variation superior for complete chest development.
Your optimal incline setting depends entirely on your unique sternum angle, which varies significantly between individuals. For those with a flat sternum, a slight incline of just 1-2 notches on most adjustable benches is ideal to maximize chest activation. This subtle adjustment creates the perfect angle to align with your natural chest structure and maximize muscle fiber recruitment.
Setting the incline too high can shift emphasis away from the chest and onto the anterior deltoids, defeating the purpose of chest-focused training. The key is finding that sweet spot where you feel maximum tension in your pectoral muscles rather than your shoulders.
Prioritizing Deep Stretch Over Heavy Weight for Better Results
With this approach in mind, the most critical aspect of incline dumbbell pressing involves prioritizing a deep stretch at the bottom of the movement over lifting heavy weight. This principle has been scientifically proven to be more effective for muscle growth than ego-lifting with compromised range of motion.
The deep stretch position at the bottom of the movement creates maximum muscle fiber lengthening, which triggers powerful growth mechanisms within the muscle tissue. This stretched position under load creates significant mechanical tension and metabolic stress, both key drivers of hypertrophy.
Focus on controlling the dumbbells through a full range of motion, allowing your elbows to drop slightly below the level of your torso at the bottom. This position maximizes the stretch on your pectoral fibers while maintaining joint safety. The weight should be challenging but manageable enough to maintain perfect form throughout the entire range of motion, emphasizing the quality of each repetition over the quantity of plates loaded.
Exercise 2: Seated Cable Fly for Complete Chest Development

Why Cable Flies Beat Pec Deck Machines for Muscle Growth
While pec deck machines remain popular in commercial gyms, they fall short of delivering optimal chest development compared to seated cable flies. The fundamental issue with pec deck machines lies in their resistance curve – they become hardest at the end of the movement during the squeeze phase. However, current research reveals that challenging muscles in the stretched position delivers superior growth, particularly for the outer chest fibers.
Seated cable flies, when properly executed, provide the exact opposite benefit. They challenge the chest muscles in a deep stretch position and maintain consistent tension throughout the entire range of motion. This continuous tension, combined with the emphasis on the stretched position, creates an ideal stimulus for muscle growth that pec deck machines simply cannot match.
The superior muscle-building potential of cable flies stems from their ability to target the chest from multiple angles while maintaining optimal resistance throughout the movement pattern. This makes them an invaluable exercise for complete chest development.
Proper Setup with Half Foam Roller and Cable Height Positioning
The setup for seated cable flies requires precise positioning to maximize effectiveness. Begin by placing an incline bench in the middle of a cable machine, ensuring equal access to both cable handles. The key innovation in this setup involves positioning a half foam roller behind your back on the bench.
This half foam roller serves a crucial purpose – it opens up the chest cavity, allowing for a deeper stretch at the bottom of the movement. The enhanced stretch position directly translates to greater muscle activation and growth stimulus.
Cable height positioning is equally critical for optimal results. Set both cables at shoulder height to ensure proper alignment with your chest muscles. Once positioned on the bench with the foam roller in place, scoot your buttocks forward on the bench. This forward positioning creates the ideal angle for chest engagement while maintaining proper form throughout the exercise.
Preventing Shoulder Dominance to Keep Tension on Chest
Maintaining chest dominance throughout the movement requires specific technical cues and body awareness. The most critical aspect is keeping your forearms in line with the cable throughout the entire range of motion. This alignment ensures that the chest muscles remain the primary movers rather than allowing the shoulders to take over.
To enhance chest engagement, imagine a string pulling your sternum upward throughout the movement. This mental cue helps maintain proper posture and chest positioning. Additionally, focus on actively squeezing your biceps into the sides of your chest during each repetition. This internal cue redirects tension away from the shoulders and back to the target muscles.
Recognizing when to stop each set is crucial for maintaining quality repetitions. Continue performing repetitions only as long as you can maintain perfect form. The moment your shoulders begin to creep forward, this indicates that your chest muscles have reached failure and the shoulders are attempting to compensate. Stopping at this point ensures maximum chest stimulation while preventing shoulder dominance from compromising the exercise’s effectiveness.
Advanced Techniques to Maximize Results from Both Exercises

Using Half-Reps in Stretched Position When Equipment is Limited
When equipment is limited and you only have access to basic tools like a pec deck, you can still maximize your chest development through strategic training techniques. The key lies in extending your sets beyond traditional failure points. After completing your full range-of-motion repetitions until you reach muscular failure, immediately transition into half-repetitions performed specifically in the stretched position of the movement.
This technique capitalizes on the muscle’s ability to continue working even when it can no longer complete full repetitions. The stretched position is particularly valuable for chest development as it places maximum tension on the muscle fibers when they’re elongated, promoting greater muscle damage and subsequent growth. By performing as many half-reps as possible in this position, you’re essentially doubling down on the most beneficial portion of the exercise range of motion.
Progressive Overload Strategies While Maintaining Perfect Form
Now that we have covered the importance of maximizing each set, the next critical component involves systematic progression. Once you’ve mastered the movement patterns and can consistently feel proper chest activation during both exercises, you can begin the progressive overload process. However, this progression must be approached with patience and precision.
The key principle here is to slowly increase the weight while maintaining the exact form that allowed you to achieve optimal chest activation in the first place. Rushing this process by adding too much weight too quickly will inevitably lead to form breakdown, which defeats the entire purpose of these carefully selected exercises. Progressive overload should be viewed as a gradual, methodical process where each small increase in resistance builds upon the solid foundation of perfect technique you’ve already established.
Volume and Frequency Guidelines for Optimal Growth
With this in mind, the final piece of the puzzle involves understanding the optimal training parameters for maximum chest development. The research-backed approach focuses on executing these two chest exercises with three fundamental pillars: correct form, sufficient volume, and proper progression.
Optimal growth can be achieved when you consistently apply these principles across your training sessions. The volume should be sufficient to stimulate growth without overwhelming your recovery capacity, while the frequency should allow for adequate rest between sessions. The progression component ties everything together, ensuring that your muscles continue to face increasing challenges over time while maintaining the technical proficiency that makes these exercises so effective for chest development.

The truth is, whether you’re training at home or in the gym, the location matters far less than your exercise selection and execution. What truly drives chest growth is choosing movements that match your unique genetic structure and emphasizing the deep stretch position where your muscles are challenged most effectively. The barbell bench press might work for the majority, but if you’re an outlier like many of us, switching to exercises like the incline dumbbell press and seated cable fly can unlock the growth you’ve been struggling to achieve.
Your chest development doesn’t depend on having access to the most expensive equipment or the busiest gym. It depends on understanding your body’s specific needs – your sternum angle, your muscle fiber orientation, and your ability to maintain proper form under tension. Focus on mastering these two key movements with perfect technique, prioritize that crucial stretch position, and progressively overload over time. The results will speak for themselves, regardless of where you choose to train.
Ready to transform your chest? Start your Lower Chest Workout today whether at home or in the gym and see faster, stronger, and more defined results!
Keep reading and stay healthy!